Showing posts with label Sale-a-bration 2010. Show all posts

Apr 20, 2010

A Ribbon Flower

Hi Everyone,


During Sale-a-bration, I made this card but never showed it to you....


This was my first attempt at a Ribbon Flower and they are soooo easy but effective on your card or even a scrapbook page... mmm that gives me an idea...


Anyway, this is my card:


Thanks for looking,

Mar 28, 2010

Last days of Sale-a-bration and a sneak peek...

Hi All,

Straight off, I must apologise about the quality of these photos.. My camera charger has taken itself for a walk somewhere and so I've used my camera on my phone to take these pics so they aren't the best quality...


Anyway, this one is using the Happy Moments Sale-a-bration stamp set with a sneak peek of the new Rich Razzleberry cardstock & ribbon coming in April.


Materials Used:
Stamp Set: Happy Moments
Card: Kraft, Whisper White, Pink Pirrouette, Rich Razzleberry
Ink: Black Staz-on & Versamark
Other: Rich Razzleberry Ribbon, Dimensionals, Scallop Punch, Snail Adhesive


And this card is using the soon to be released Pony Party & Teeny Tiny Stamp Sets and I've loosely cased the layout from the new catty.


Materials Used:
Stamp Set: Pony Party, Teeny Tiny Sentiments & Eastern Blooms
Card: Orchid Opulence, Pretty in Pink & Whisper White
Ink: Black Staz-on & Versamark
Other: Stampin' Write Markers, White Gel Pen, Slot punch; Word Window punch, Dimensionals, Purple ribbon from my stash


Well, hopefully I'll be back tomorrow with some better photos and more sneak peeks :)


Thanks for looking,

Mar 15, 2010

Are YOU a maybe?

Hi there readers,

I'm popping in for a quick hello tonight and then its off to bed for an early night for me! Well, once I tidy up a few more things... Such is the life of a mum! lol..

I want to remind you that the Sale-a-bration and the Summer mini catty will finish at the end of this month. So if you are a 'maybe', why not use the Sale-a-bration to your advantage and host a workshop to receive FREE Stampin' Up! goodies. Please leave me a comment or email me to book your workshop. Don't forget there are extra FREEBIES during Sale-a-bration.

Mention this message and there will be a bonus for you!!!


I'll be back tomorrow with some pics of the projects from my Easter Class held on Friday night.


Thanks for looking,

Mar 12, 2010

Back with more bunnies!

Hi Everyone,

I don't think I could blame you if you are coming to the conclusion that I love chocolate bunnies! lol

But I'm being good and sticking with the non-chocolate sort and thus have made some more Easter themed cards with my Stampin' Up! Bunny! I made 2 of each of these cards towards the Easter raffle at the Playgroup we attend each week.


(The blotch in this photo from my camera -
I've no idea why! The card looks fine in real life)


Materials Used:
Stamp: Chocolate Bunny, "For You" sentiment from Vintage Labels (Free Sale-a-bration Set)
Card: Chocolate Chip, Pumpkin Pie, Regal Rose & Whisper White
Designer Series Paper: Sweet Always
Ink: Chocolate Chip
Other: Whisper White grosgrain ribbon, silver thread from my stash, Scallop square punch, Scallop edge punch, dimensionals


Thanks for looking,

Mar 3, 2010

Sale-a-brate with a Trifold Card

Hi Everyone,

I've made a little trifold card here... Its a great way to add interest to your card without lots of layers and getting a chunky card.

Here's a pic of the card tied closed with some vanilla ribbon:


And here's the card half open:


And here's the inside of the card:


Materials Used:
  • Stamp Set: "Happy Moments" (Sale-a-bration 2010); "Boho Backgrounds";
  • Cardstock: Very Vanilla, Taken with Teal, Summer Sun
  • Other: Black Stazon ink, Stampin' Up Markers (Taken with Teal, Summer Sun and Brocade Blue); Very Vanilla grosgrain ribbon
I have made this style of card at a workshop for a mix of ladies with card making experience and some beginners and it went down a treat. If you are interested, I'd be happy to conduct a class at your house and show you how to make these lil' cards and how to can receive this stamp set for free! Of course, you'll have to be living in the Perth area though....


Until next time, Happy Stamping!

Feb 23, 2010

Happy Moments...

Hi Everyone,

I'm still on my mission of using up my Leaning Tower of Pisa of card and paper pieces... So here's some more cards:


Materials Used:
Stamp sets: "Happy Moments" Sale-a-bration Set (you can earn this for FREE with any order over $100 before March 31st)
Other: Scallop Square punch, Corner punch, 2mm circle punch, brads, Stampin' Write Markers, Basic Black inkpad


This next card is approx 10cm square:


The layer of Pretty in Pink card behind the flowers has been run through the crimper twice to create a waffle cone (yum!) effect.

Materials Used:
Stamp Set: "Happy Moments", Sentiment and background flowers are both from retired sets and I can't think of their names... oops!
Other: Stampin' Write Markers, Eyelet border punch, Whisper White grosgrain ribbon, crimper


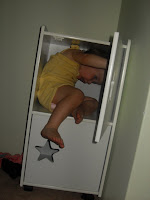
And another happy moment, although its family and not cards:

My youngest daughter decided that the best spot to hide was in her hat & shoe cupboard! Here's a couple of pics of our silly monkey...


Now in case you are wondering, she worked this trick out all by herself, including closing the door after she's inside. She also worked out that a karate chop or kick gets the door open and makes a good bang onto the wall as well. And all this during her supposed sleep.... Whilst I was cross at the mess and the lack of sleep, I couldn't help but laugh.


Thanks for looking,

Feb 22, 2010

Scalloped Ovals without a punch

Hi All,

This is another card I made over the weekend, and its one of several where I have been trying to use up some scraps and precut card sitting several stories high on my side table to my desk. Actually, I'm pretty sure this pile could take on the Leaning Tower of Pisa for a feat of physics.


Anyway, here's the card:


And here's an upclose pic of the detail:


Now I've made this scalloped oval around the sentiment from my scalloped border punch and its remarkably easy. I'm pretty sure I saw this tip on another stamper's blog, but I can't remember who - if its you, please let me know and I'll set up the appropriate links. Otherwise, if you are interested in trying it yourself, I've outlined the steps below:


Making Your Own Scalloped Oval:
  1. Cut a thin strip of cardstock and punch along one edge. My finished strip was about 5mm wide at the widest part (across the scallop)
  2. Take your stamped and punched oval sentiment, and place sticky strip adhesive all around the edge on the back. For this card, I've layered my punched sentiment on a piece of kiwi kiss card and trimmed to shape with my paper snips.
  3. Gently adhere your scalloped strip to the back of your oval, slightly bending the strip around the oval. If you look really closely, you may be able to pick up where I was a little too rough and ripped the scalloped strip.
  4. I finished off by sponging around the edge and then adhered the entire sentiment to my card with more sticky strip.
Not bad for my first attempt hey!

I've also used some rhinestone brads for the centre of my filagree flower brads. The plain brads just weren't going to be enough on this card.


Materials Used:
Stamp Set: "Vintage Labels" & "Boho Backgrounds"
Cardstock / Ink Colours: Basic Grey, Kiwi Kiss & Whisper White
Other: Designer Series Paper - Urban Garden, Filagree Brads, Wide Oval Punch, Sponge Daubers, Paper Snips


Thanks for looking,